So I made the horrible mistake of starting this blog a couple of weeks before an exam.... So I might have to have shorter posts/throwback posts.
Today, I wore the skirt that I refashioned last night. It's on its way to becoming a dress, but in the meantime, I am going to enjoy it as a skirt.
This was the before: extremely dowdy length. But I loved the soft cotton fabric and the pretty flowers. I saw the potential in this Value Village find. First thing I did was put a pin in where I wanted the skirt to end (mid-thigh) and then cut it about an inch below that.
I then folded over the raw edge and pinned it, ran it through my sewing machine and ironed it to get a crisp hem (and it looked really uneven before ironing). To get an even hem, I just made a snip an inch below my pin and started folding the fabric as I was cutting it. (PS if you're wondering what the grey fuzzy in the corner is, that's kitty's paws. He can't help but want to be in all of my photos.)
And here is the skirt after. Much sexier/cuter for spring/summer. Like I said, I have big plans for the excess fabric. But I was too excited about the skirt to wait to wear it!
30 April 2013
28 April 2013
Sewing Machine Dust Cover Part 2
This is a continuation of Sewing Machine Dust Cover tutorial. Part 1 can be found here.
When I finally got back to my project, I had to make it pretty, personalize it, and add button to keep the sides closed. I started with a strap across the top to break up the red and give me something to pull when I take the cover off.
I used the excess fabric from the flaps, folded it over a couple times (raw edge in) and then sewed two lines up the sides. I attached it in four places with a decorative stitch.
I used the same decorative stitch to divide the large pockets into 3 small ones on one side and two (one large for the pedal and wired, and one small) on the other side.
I also wanted to break up the pockets with a personal touch, so I cut out two hearts from the excess red fabric and hand stitched them on, one on each side.
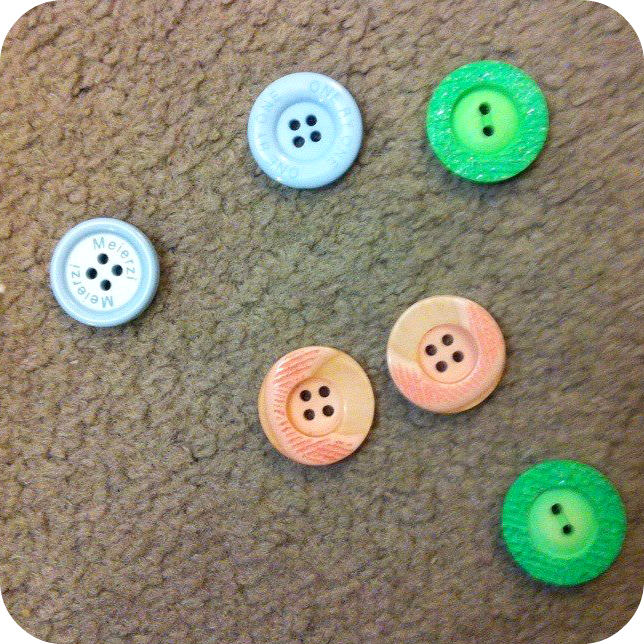
I knew from the beginning that I wanted to use red buttons for this. I didn't have any red buttons, nor the desire to go all the way to fabricland just for some buttons. Instead, I raided my craft box for my bag of dollar store craft buttons.
Super ugly reject buttons. That didn't match at all. But I had a solution:
It took a few coats (it looked pink in areas and some of the green shone through), but in the end, it looked quite nice.
The first button I attached to the large pocket, as it gaped a lot with the pedals in it. I used one of the extra "strings" that I cut off the sham at the beginning of the project to make a loop for the button. I sewed that on by hand and cut off the excess.
I sewed on three buttons per side down both sides. I quickly realized that I would not have enough of the black and white string, so I went back to my scrap box for some red ribbon. I folded that in half and machine stitched down the side as close to the edge as possible, and then cut it to length. I made the loops in the same manner as above, alternating between red ribbon and black and white string. I used a lit incense to melt the ends of the ribbon to prevent fraying.
Lastly, at the very logical suggestion made by the BF, I decided to make a hand-hole in one side so I could pick up the sewing machine by the handle with the cover still on. Basically, I made a giant buttonhole. I put the cover on the machine and marked out where the handle was with charcoal. I then stitched around the line with another decorative stitch. I used a seam ripper to start the cut and finished it with my fabric scissors. I decided to keep the raw white edges for the contrast.
And that was that! Even though it's not perfect, I'm proud of my first finished sewing machine project.
Here are photos of the final finished product.
 |
| Qi would not leave the backdrop alone until I took some pics of him for my blog. |
Saving images for web comparison
26 April 2013
Sewing Machine Dust Cover Part 1
I got a brand new sewing machine last week! It was very exciting, since I've never had one, and sewed a lot of things by hand, which got very tedious very quickly as I got more into sewing.
Unfortunately, it didn't come with a dust cover, or carrying case of any kind, so I though of the perfect project to start off with: making my own dust cover!
And I had just the materials to use in storage: a pillow sham and an old red sheet that would look super cute together.
The pillow sham had two flaps that would turn into pockets for the foot pedal and wires, and little strings that will turn into button loops. Or cat toys.
Qi voted for cat toys.
I cut off the tags and strings, and then cut down the sides of the flaps to open it up. Some was helping... (Qi loves sewing.)
I don't have a picture of the sheet, so you'll just have to trust me. It's an old fitted sheet with a few rips along the edges. I'm a big believer in up-cycling and not wasting otherwise good fabric.
After ironing the sheet I pinned it to the sham and cut around it, leaving about 1.5 inches for hemming.
And then hemmed it, as well as the raw edges from the sham.
I then pinned them together and pinned down the pockets where I wanted them to fold.
I sewed everything down, starting in the middle and then the pocket, re-pinning as I went.
And then it was 8:30 pm, I realized I didn't have dinner, and I was super tired from lack of sleep the night before, so I will continue the project tonight. I need to add finishing touches like buttons, a handle across the top, and maybe an applique.
Click here for Part 2.
23 April 2013
My first post! A clock face-lift
Ok, now that I've got my blog looking the way I want to (almost), I guess it's time for my first real post!
I am going to show off my most recent craft/paint job. I had a cute shabby-chic clock that I had gotten at Value Village that I thought was gorgeous but in no way fit the decor of my apartment.
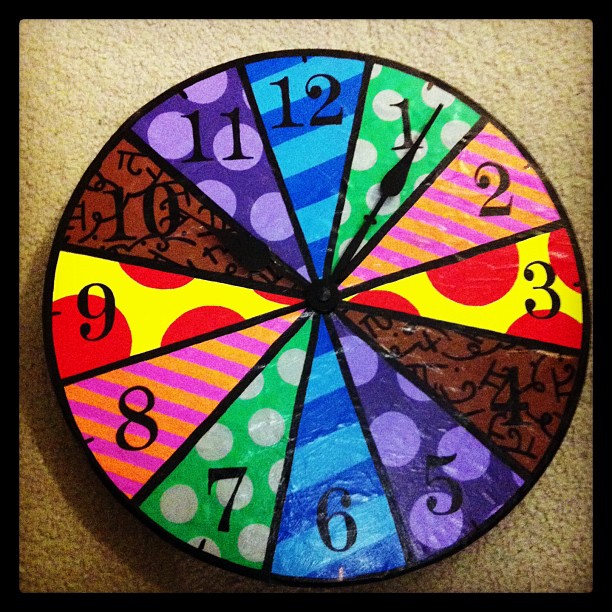
I decided to give it a new face by painting it. I was inspired by Romero Britto, my favorite painter. My bathroom has several prints (and one of my own), in the style of Britto. I painted the clock to match.
So, I didn't actually paint the clock itself. I traced a circle onto a piece of scrapbook size paper and cut it out. I traced lines onto the paper using a protractor (first time since high school math class!) I then used a stencil and ruler to draw out the patterns that I wanted. For the numbers, I chose a font I liked and printed out the numbers. I traced them on using carbon copy paper. Then I very carefully painted in the colors, then the black lines, and finally the numbers. No special time saving techniques, just slow and steady to get the lines perfectly crisp. Once finished, I cut a circle out in the center using my shapecutter. I took the hands off the clock (just pulled them straight up) and then mod-podged the paper onto the clock face (mod-podge on the face, then I put the paper down, smoothed it out, and then a coat of podge on top). I was a bit worried about the bubbling under the paper, but it seemed to sort itself out as it dried. After 24 hours, I painted on another coat of mod-podge.
Here is a picture of the finished product as promised- you can see that the bubbles have all settled out, and now it's hanging in my bathroom, so I can watch the time while doing my hair and make-up in the morning :).
Subscribe to:
Comments (Atom)


